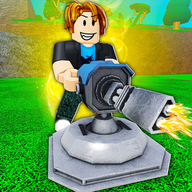
Dominate Waves: Unlocking Build a Base RNG Best Objects for Max Defense
Discover the ultimate strategy for Build a Base RNG! Learn which objects to prioritize, how to upgrade, and build an impenetrable defense to conquer every wave.
Master Your Defense: Why Object Selection Matters in Build a Base RNG
Are you ready to build an unyielding fortress in Roblox's Build a Base RNG? Surviving endless waves of zombies isn't just about placing objects; it's about strategic selection, meticulous placement, and smart upgrading. Understanding the Build a Base RNG best objects can transform your gameplay from struggling to thriving, pushing your base to new record-breaking waves.
Many players find themselves stuck, their defenses crumbling long before they hit significant milestones. This often stems from a lack of understanding regarding which objects offer the most value and how to integrate them into a cohesive defense strategy. This comprehensive guide will walk you through the top-tier objects, optimal layouts, and crucial upgrade paths to help you master Build a Base RNG and achieve unparalleled longevity. If you're looking to elevate your game, knowing the Build a Base RNG best objects is your first step towards an impenetrable base.
For more information on the game, you can visit the official Build a Base RNG game page on Roblox.
The Foundation: Prioritizing Early-Game Defenses
Starting strong in Build a Base RNG is crucial. Your initial object choices lay the groundwork for your entire defense, dictating how well you'll withstand the early, less intense waves and scale into the mid-game. Focusing on objects that offer both durability and area-of-effect damage can give you a significant edge.
Essential Early-Game Objects
Metal Blockades are your bread and butter for initial defenses. While seemingly basic, their upgradability makes them incredibly resilient. As observed in player experience, a fully upgraded Metal Blockade can reach significant health pools, acting as a formidable first line of defense. They are inexpensive to start with and provide a solid health buffer.
Equally important are Witch Brews. These seemingly simple items are surprisingly overpowered (OP) in the current meta, according to community reports. Their splash damage and damage-over-time (DoT) effect on zombies that walk over them make them excellent for clearing groups and softening up tougher enemies. Placing them strategically behind your initial blockades ensures continuous damage as zombies attempt to break through.
Here’s a quick overview of early-game object priorities:
Focusing on these objects and their upgrades will allow you to comfortably clear the initial waves and build resources for more advanced defenses.
Mid-Game Mastery: Expanding Your Arsenal
As waves intensify, your base needs to evolve. Mid-game introduces more powerful objects and the necessity for more complex strategies. This is where you start to diversify your defenses, incorporating objects that offer higher damage output, better crowd control, and improved durability.
Upgrading to Gold and Beyond
Once you've established a solid early-game defense, look to upgrade your core defensive blocks. Gold Blocks, for instance, offer a substantial health boost compared to their metal counterparts. A single Gold Block can boast 75,000 health, providing a massive increase in resilience. Upgrading these blocks directly translates to your base surviving significantly longer.
For offensive capabilities, Golden Traps are excellent additions. Placed strategically, these traps can slow down and damage zombies, buying your other defenses precious time. Player experience suggests placing them on later defensive layers to maximize their impact on already weakened enemies.
Consider these powerful additions for your mid-game setup:
The key in mid-game is balance. You need robust walls to hold the line, powerful damage dealers to thin out hordes, and crowd control to manage the flow of enemies. Prioritizing upgrades for your most impactful objects will ensure you're always prepared for the next wave.
Advanced Strategies: Optimizing Your Base Layout
Beyond individual object selection, the overall layout of your base is paramount. A well-designed layout can maximize the effectiveness of every object, ensuring zombies are constantly under attack and your core is protected. Community-tested strategies often involve layered defenses that force zombies to break through multiple barriers.
The "Row-by-Row" Defense Principle
One highly effective strategy, as demonstrated by experienced players, is the "row-by-row" defense. This involves creating multiple layers of robust blocks, forcing zombies to destroy one entire row before they can advance to the next. This method distributes damage across many blocks, preventing a single point from being overwhelmed.
Key Layout Principles:
- Width over Depth (initially): Build your initial defensive lines as wide as possible. This spreads out the attacking zombies, preventing them from concentrating fire on a single block. Wider defenses also allow for more simultaneous object placements.
- Layered Walls: Create multiple rows of blocks, ideally 3-4 deep, separated by damaging or slowing objects. For example, a row of Gold Blocks, followed by Witch Brews, then another row of Gold Blocks, and so on.
- Strategic Mortar Placement: Place mortars (like Space Mortars) at the very front of your base, but behind your initial blockades. This ensures they can fire upon incoming zombies for the longest possible duration, dealing damage before enemies even reach your walls.
- Back-Row Support: Utilize objects like Robust Teslas in your back rows to fill gaps and provide additional damage as zombies get deeper into your base. Golden Traps can also be excellent in these later stages to slow down any stragglers.
Remember, the goal is to create a gauntlet that zombies must endure, taking damage and being slowed at every turn. The more rows and defensive objects they have to chew through, the higher your wave count will climb.
The Upgrade Advantage: Maximizing Object Potential
Even the Build a Base RNG best objects are only as good as their upgrade level. Upgrades are not merely incremental improvements; they are transformative, significantly boosting an object's health, damage, or effect duration. Neglecting upgrades is a common mistake that severely limits a base's potential.
Why Upgrades Are Non-Negotiable
Every object in Build a Base RNG benefits from upgrades. For defensive blocks, this means a direct increase in health, allowing them to withstand more hits. For offensive units like Witch Brews or Mortars, upgrades boost their damage output, splash radius, or duration of effects. For example, a Metal Blockade upgraded to level 47, as seen in player demonstrations, can boast 113,000 health, making it incredibly sturdy.
Key Upgrade Considerations:
- Prioritize Core Defenses: Your primary defensive blocks (Metal, then Gold) should receive consistent upgrades. Their health directly correlates with your base's survival time.
- Boost High-Impact Offenses: Objects like Witch Brews, Mortars, and Ice Spheres that deal significant damage or provide crucial crowd control should also be heavily upgraded to maintain their effectiveness against tougher enemies.
- Utilize Relics: The game features "BOSSES UPDATE" where fighting powerful bosses yields relics. These relics can be used to craft new, "OP objects," suggesting another avenue for obtaining and enhancing top-tier items. Community reports indicate that investing in boss fights can unlock powerful new avenues for upgrades and unique objects.
- Balance is Key: While it's tempting to focus solely on one type of upgrade, a balanced approach ensures all aspects of your defense are robust. Don't let your damage fall behind your durability, or vice-versa.
Here's an overview of upgrade priorities:
Remember, the goal is not just to have the Build a Base RNG best objects, but to have the best upgraded objects. Consistent upgrading is what will push your base beyond previous limits and into record-breaking territory.
Top-Tier Objects for End-Game Survival
Reaching the higher waves in Build a Base RNG demands not just good objects, but truly exceptional ones. While specific "end-game" objects are often tied to progression and luck (given the "RNG" in the title), certain categories and advanced versions of existing objects consistently stand out as the Build a Base RNG best objects for extreme longevity.
The Power of "OP Items" and Progression
As waves progress, zombies become incredibly strong. This is where the game explicitly states you'll need "better stuff" and "OP items." While the video primarily focuses on accessible mid-game strategies, it hints at the existence of even more powerful items, such as the "galaxy one" brew, which is implied to be a superior version of the already potent Witch Brew.
What to look for in end-game objects:
- Massive Health Pools: Blocks that can withstand hundreds of thousands, if not millions, of damage.
- Overwhelming AoE Damage: Attackers that can clear entire screens of high-health zombies quickly.
- Superior Crowd Control: Objects that can reliably stun, freeze, or significantly slow down bosses and elite enemies.
- Unique Synergies: Items that work together in powerful combinations to create an impenetrable death zone.
| Object Category | Ideal Role in End-Game | Acquisition Tip ```
Master Your Defense: Why Object Selection Matters in Build a Base RNG
Are you ready to build an unyielding fortress in Roblox's Build a Base RNG? Surviving endless waves of zombies isn't just about placing objects; it's about strategic selection, meticulous placement, and smart upgrading. Understanding the Build a Base RNG best objects can transform your gameplay from struggling to thriving, pushing your base to new record-breaking waves.
Many players find themselves stuck, their defenses crumbling long before they hit significant milestones. This often stems from a lack of understanding regarding which objects offer the most value and how to integrate them into a cohesive defense strategy. This comprehensive guide will walk you through the top-tier objects, optimal layouts, and crucial upgrade paths to help you master Build a Base RNG and achieve unparalleled longevity. If you're looking to elevate your game, knowing the Build a Base RNG best objects is your first step towards an impenetrable base.
For more information on the game, you can visit the official Build a Base RNG game page on Roblox.
The Foundation: Prioritizing Early-Game Defenses
Starting strong in Build a Base RNG is crucial. Your initial object choices lay the groundwork for your entire defense, dictating how well you'll withstand the early, less intense waves and scale into the mid-game. Focusing on objects that offer both durability and area-of-effect damage can give you a significant edge.
Essential Early-Game Objects
Metal Blockades are your bread and butter for initial defenses. While seemingly basic, their upgradability makes them incredibly resilient. As observed in player experience, a fully upgraded Metal Blockade can reach significant health pools, acting as a formidable first line of defense. They are inexpensive to start with and provide a solid health buffer.
Equally important are Witch Brews. These seemingly simple items are surprisingly overpowered (OP) in the current meta, according to community reports. Their splash damage and damage-over-time (DoT) effect on zombies that walk over them make them excellent for clearing groups and softening up tougher enemies. Placing them strategically behind your initial blockades ensures continuous damage as zombies attempt to break through.
Here’s a quick overview of early-game object priorities:
Focusing on these objects and their upgrades will allow you to comfortably clear the initial waves and build resources for more advanced defenses. Understanding these foundational elements is key to identifying the Build a Base RNG best objects for your early game.
Mid-Game Mastery: Expanding Your Arsenal
As waves intensify, your base needs to evolve. Mid-game introduces more powerful objects and the necessity for more complex strategies. This is where you start to diversify your defenses, incorporating objects that offer higher damage output, better crowd control, and improved durability.
Upgrading to Gold and Beyond
Once you've established a solid early-game defense, look to upgrade your core defensive blocks. Gold Blocks, for instance, offer a substantial health boost compared to their metal counterparts. A single Gold Block can boast 75,000 health, providing a massive increase in resilience. Upgrading these blocks directly translates to your base surviving significantly longer.
For offensive capabilities, Golden Traps are excellent additions. Placed strategically, these traps can slow down and damage zombies, buying your other defenses precious time. Player experience suggests placing them on later defensive layers to maximize their impact on already weakened enemies.
Consider these powerful additions for your mid-game setup:
The key in mid-game is balance. You need robust walls to hold the line, powerful damage dealers to thin out hordes, and crowd control to manage the flow of enemies. Prioritizing upgrades for your most impactful objects will ensure you're always prepared for the next wave. These are among the Build a Base RNG best objects for navigating the mid-game challenge.
Advanced Strategies: Optimizing Your Base Layout
Beyond individual object selection, the overall layout of your base is paramount. A well-designed layout can maximize the effectiveness of every object, ensuring zombies are constantly under attack and your core is protected. Community-tested strategies often involve layered defenses that force zombies to break through multiple barriers.
The "Row-by-Row" Defense Principle
One highly effective strategy, as demonstrated by experienced players, is the "row-by-row" defense. This involves creating multiple layers of robust blocks, forcing zombies to destroy one entire row before they can advance to the next. This method distributes damage across many blocks, preventing a single point from being overwhelmed.
Key Layout Principles:
- Width over Depth (initially): Build your initial defensive lines as wide as possible. This spreads out the attacking zombies, preventing them from concentrating fire on a single block. Wider defenses also allow for more simultaneous object placements.
- Layered Walls: Create multiple rows of blocks, ideally 3-4 deep, separated by damaging or slowing objects. For example, a row of Gold Blocks, followed by Witch Brews, then another row of Gold Blocks, and so on.
- Strategic Mortar Placement: Place mortars (like Space Mortars) at the very front of your base, but behind your initial blockades. This ensures they can fire upon incoming zombies for the longest possible duration, dealing damage before enemies even reach your walls.
- Back-Row Support: Utilize objects like Robust Teslas in your back rows to fill gaps and provide additional damage as zombies get deeper into your base. Golden Traps can also be excellent in these later stages to slow down any stragglers.
Remember, the goal is to create a gauntlet that zombies must endure, taking damage and being slowed at every turn. The more rows and defensive objects they have to chew through, the higher your wave count will climb. This strategic approach highlights how even common objects can become Build a Base RNG best objects when placed optimally.
The Upgrade Advantage: Maximizing Object Potential
Even the Build a Base RNG best objects are only as good as their upgrade level. Upgrades are not merely incremental improvements; they are transformative, significantly boosting an object's health, damage, or effect duration. Neglecting upgrades is a common mistake that severely limits a base's potential.
Why Upgrades Are Non-Negotiable
Every object in Build a Base RNG benefits from upgrades. For defensive blocks, this means a direct increase in health, allowing them to withstand more hits. For offensive units like Witch Brews or Mortars, upgrades boost their damage output, splash radius, or duration of effects. For example, a Metal Blockade upgraded to level 47, as seen in player demonstrations, can boast 113,000 health, making it incredibly sturdy.
Key Upgrade Considerations:
- Prioritize Core Defenses: Your primary defensive blocks (Metal, then Gold) should receive consistent upgrades. Their health directly correlates with your base's survival time.
- Boost High-Impact Offenses: Objects like Witch Brews, Mortars, and Ice Spheres that deal significant damage or provide crucial crowd control should also be heavily upgraded to maintain their effectiveness against tougher enemies.
- Utilize Relics: The game features "BOSSES UPDATE" where fighting powerful bosses yields relics. These relics can be used to craft new, "OP objects," suggesting another avenue for obtaining and enhancing top-tier items. Community reports indicate that investing in boss fights can unlock powerful new avenues for upgrades and unique objects.
- Balance is Key: While it's tempting to focus solely on one type of upgrade, a balanced approach ensures all aspects of your defense are robust. Don't let your damage fall behind your durability, or vice-versa.
Here's an overview of upgrade priorities:
Related Guides
Mastering Your Build a Base RNG Rolls: Strategies for Ultimate Riches & Defense
Unlock the secrets to optimizing your Build a Base RNG rolls. Learn strategies for better loot, powerful defenses, and becoming rich in this Roblox game.
Unlock Build a Base RNG Max Luck: The Ultimate Guide to Dominating Rolls & Drops
Master 'Build a Base RNG' on Roblox! Discover expert strategies, optimal builds, and hidden mechanics to achieve max luck for rare rolls and powerful items.